Let your folders do the capturing [Capture: Part 6]
April 13 2026 | Issue 91 | Link to this issue | Subscribe
Hi Reader –
So far in this capture series, every method we've covered requires you to do something — clip a page, snap a photo, forward an email, jot a quick note. Today's method flips that. You set it up once, and Evernote automatically captures it for you in the background.
The feature is called Sync Folders, and if you do any kind of work where files land in specific folders on your computer — scanned documents, downloaded reports, images, exported PDFs — this feature can quietly funnel all of that into Evernote automatically.
What are Sync Folders?
Sync Folders (previously called "Import Folders") let you connect a folder on your computer to a specific Evernote notebook.
Once connected, any file you drop into that folder or any file that another app saves there gets automatically imported into Evernote as a new note. Images, PDFs, and other supported file types are all fair game.
This feature is exclusive to Evernote's Mac and Windows desktop apps. Get Evernote’s free desktop client for your OS at evernote.com/download.
How to Set Up
It’s simple to set up a Sync Folder:
Open Evernote on your desktop
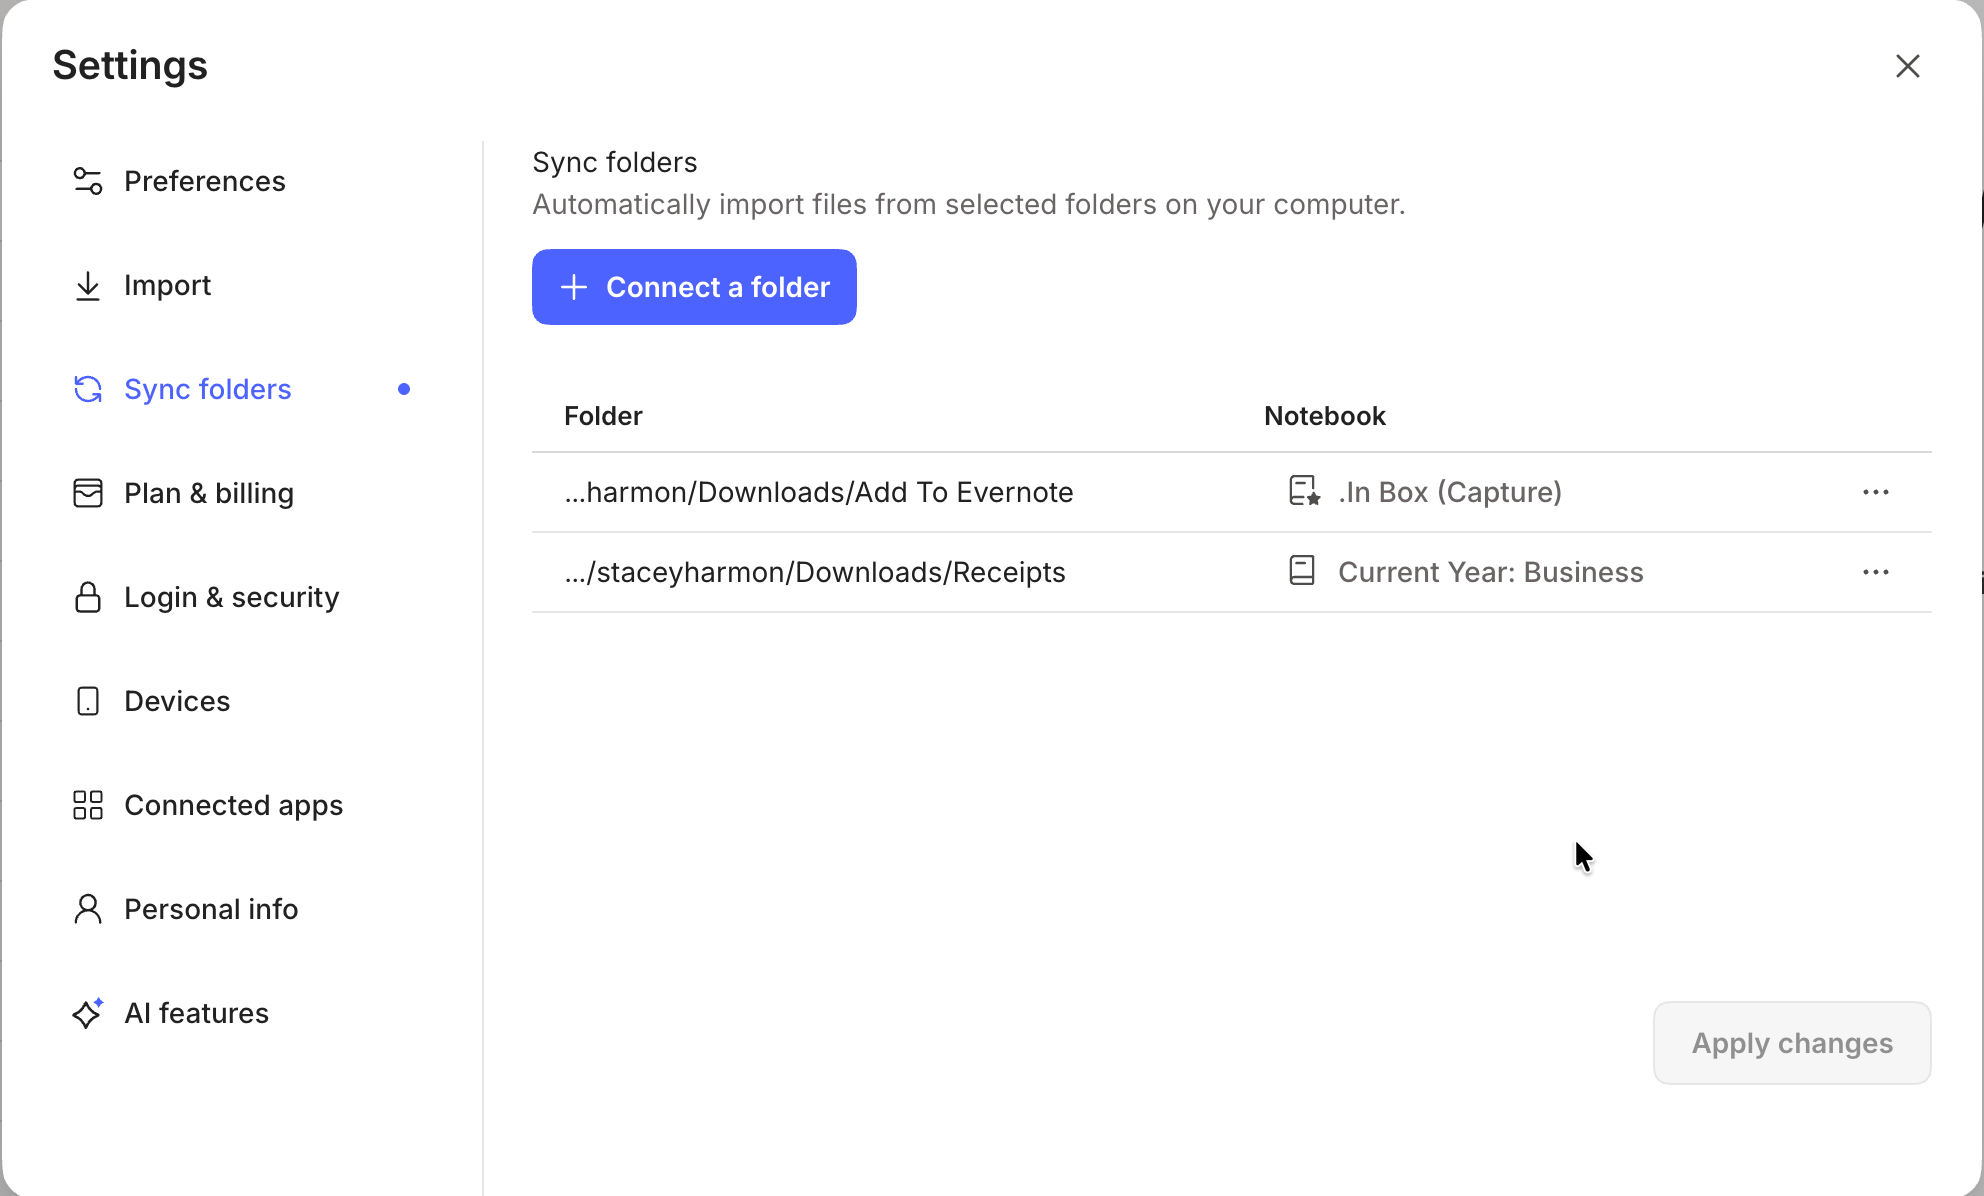
Go to Settings → Sync folder
Click “Connect folder” and select the folder you want Evernote to monitor
Choose which notebook the imported files should land in
That's it. From that point on, anything you save to that folder is automatically pulled into Evernote as an attachment in a new note.
You can connect multiple folders, and each one can point to a different notebook. For example, your scanned receipts can go straight to a "Receipts" notebook, while downloaded contracts go to "Legal".
A Few Settings Worth Knowing
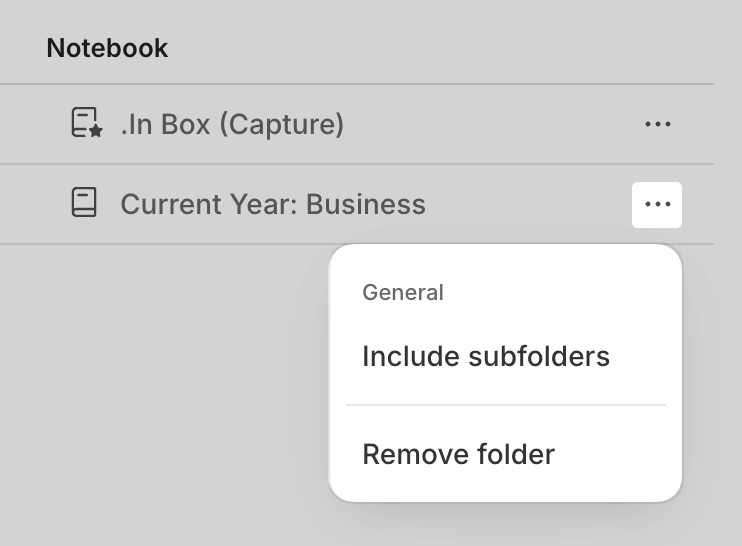
Click the three-dot menu next to any connected folder, and you'll find a couple of options:
Include subfolders — By default, Evernote only watches the top-level folder. If you also want files from subfolders to be imported, toggle this on. This is useful if your scanner software organizes output into date-based subfolders.
Remove folder — Disconnects the sync. This stops future imports but doesn't delete anything already imported into Evernote.
One important thing to know: if you edit or update a file that's already been synced, Evernote will import it again as a brand new note. It doesn't update the original. So if you're working with files that change frequently, this feature works best as a one-time capture point — not for ongoing file management.
🧠 Academy Members: Learn both the basics and workflow nuances of Sync Folders in the Masterclass: Sync Folders.
Sync Folder Workflow Ideas
The power here is in pairing Sync Folders with other tools and habits you already have in place to benefit from “micro-efficiencies” – small time savings that when repeatedly practiced, add up to significant time savings. Here are a few ideas:
Downloaded web & email files — Create a subfolder in your Downloads called "To Evernote" and connect it. When you download a PDF, report, or image you want to keep, just save it there.
Document scanners — If you use a desktop scanner, set its output folder as a Sync Folder. Every scan is automatically sent to Evernote.
Accounting software exports — If you regularly export invoices or statements, point the export folder at Evernote and let it handle the filing.
The pattern is the same: instead of saving a file and then manually importing it into Evernote, you save the file to a specific folder, and Evernote handles the rest.
Why This Matters for AI Assistant and Semantic Search
As we discussed throughout this series, centralizing your information in Evernote is what makes these AI tools so powerful.
Every file that lands in Evernote through a Sync Folder is fully indexed and searchable — including OCR on images and PDFs. That means AI Assistant and Semantic Search can work with all of it.
Imagine you've been syncing scanned receipts into Evernote all year. Come tax season, you can search across all of them instantly — even handwritten or scanned text, thanks to Evernote's OCR. And as AI Assistant gets smarter about working with your notes, that well-organized archive only becomes more valuable.
That's the power of automated capture. You're building your searchable knowledge base without adding steps to your day.
My Recommended Setup
If you're new to Sync Folders, start simple. Create one dedicated folder on your desktop — something like "Add to Evernote" — and connect it to an inbox-style notebook. Use it as a drop zone for anything you want captured: scanned mail, downloaded PDFs, exported files, etc.
Once you see how effortless automated capture is, you'll start thinking about what other folders on your computer could be working for you in the background.
Cheers to your productivity –
Stacey

Subscribe to auto-receive my next tip!
No fluff. Just practical, immediately actionable advice from someone who's been teaching Evernote mastery for over a decade. Sent every Monday, for free.